How to Manage Contacts in OpenCRMApp
— Search, Edit, Import & More
The Contacts module in OpenCRMApp gives you full control over your vtiger CRM contact database directly from your phone. Find any contact in seconds with real-time search, edit records with smart address autocomplete, import phone contacts in bulk, and see every linked deal, ticket, and email from a single screen — no laptop required.
Switching Between List Views
When you open the Contacts module, the default view shows All contacts. But your vtiger CRM administrators can create custom saved views — and every one of them is accessible from the app with a single tap.
Tap the ≡ All pill (top-left of the list) to open the Views panel. You'll see every view configured in your CRM, including:
- All — every contact, no filter (selected by default with a blue checkmark)
- Contacts Address — contacts that have a mailing address on file
- Todays Birthday — contacts whose birthday is today, great for a quick check every morning
- VIP Customers — your high-priority accounts
- Customers by Industry — segmented view by industry field
- Customers Not Contacted in 30 Days — re-engagement list automatically filtered by last activity date
- Key Decision Makers — contacts flagged with a specific role or title
A Search views… bar at the top of the panel lets you filter the view list when you have dozens of saved views.
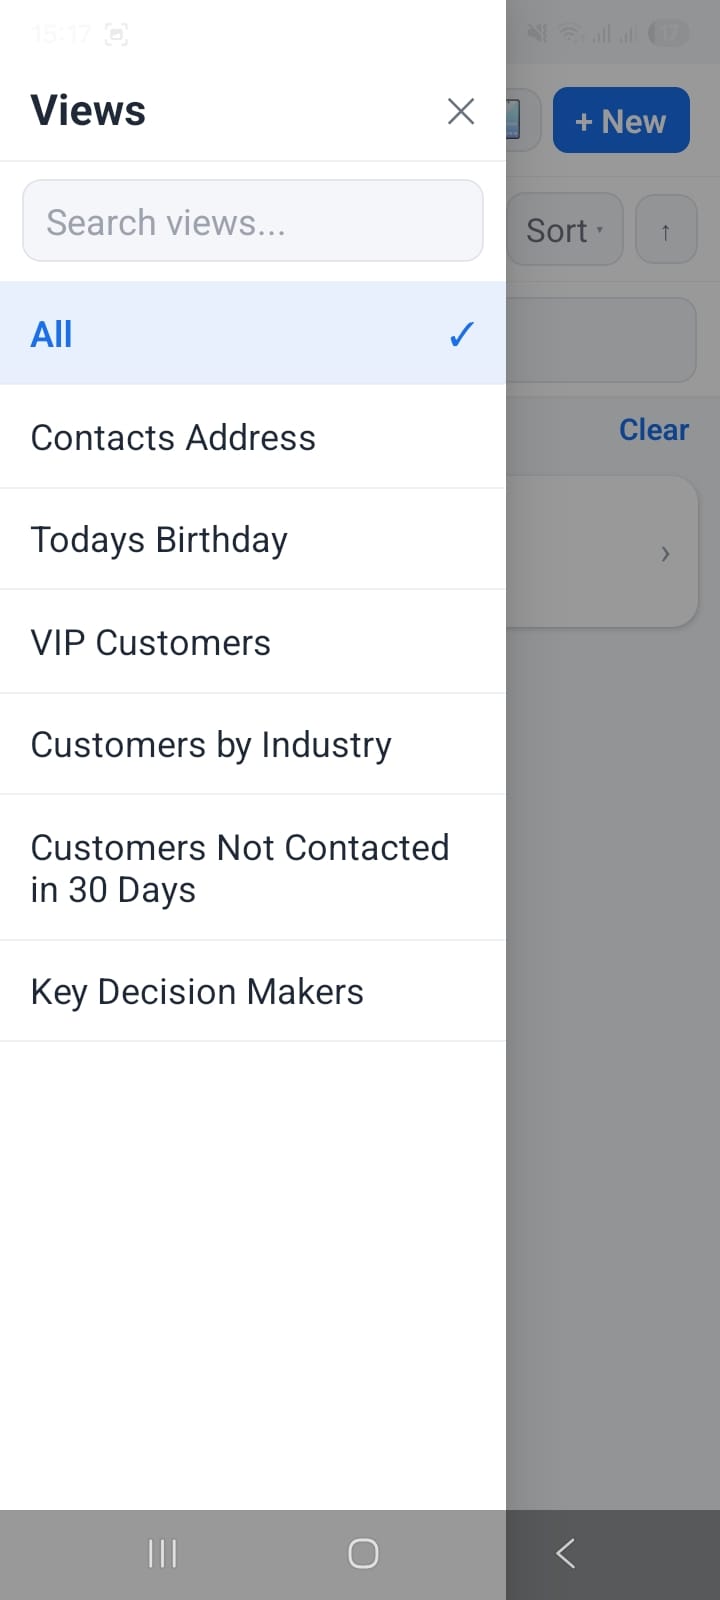
Views panel — tap any saved view to instantly filter your contacts list, no manual filtering needed
Real-Time Contact Search with Keyword Highlighting
The search bar sits directly below the view selector on the Contacts list. As you type, the list filters instantly — no need to press Enter or a search button. Matching characters are highlighted in yellow inside each result so you can confirm at a glance that the right record was found.
The counter below the search bar shows exactly how many records match — for example, "0 of 20 records" updates in real time. Tap Clear to reset the search and return to the full list.
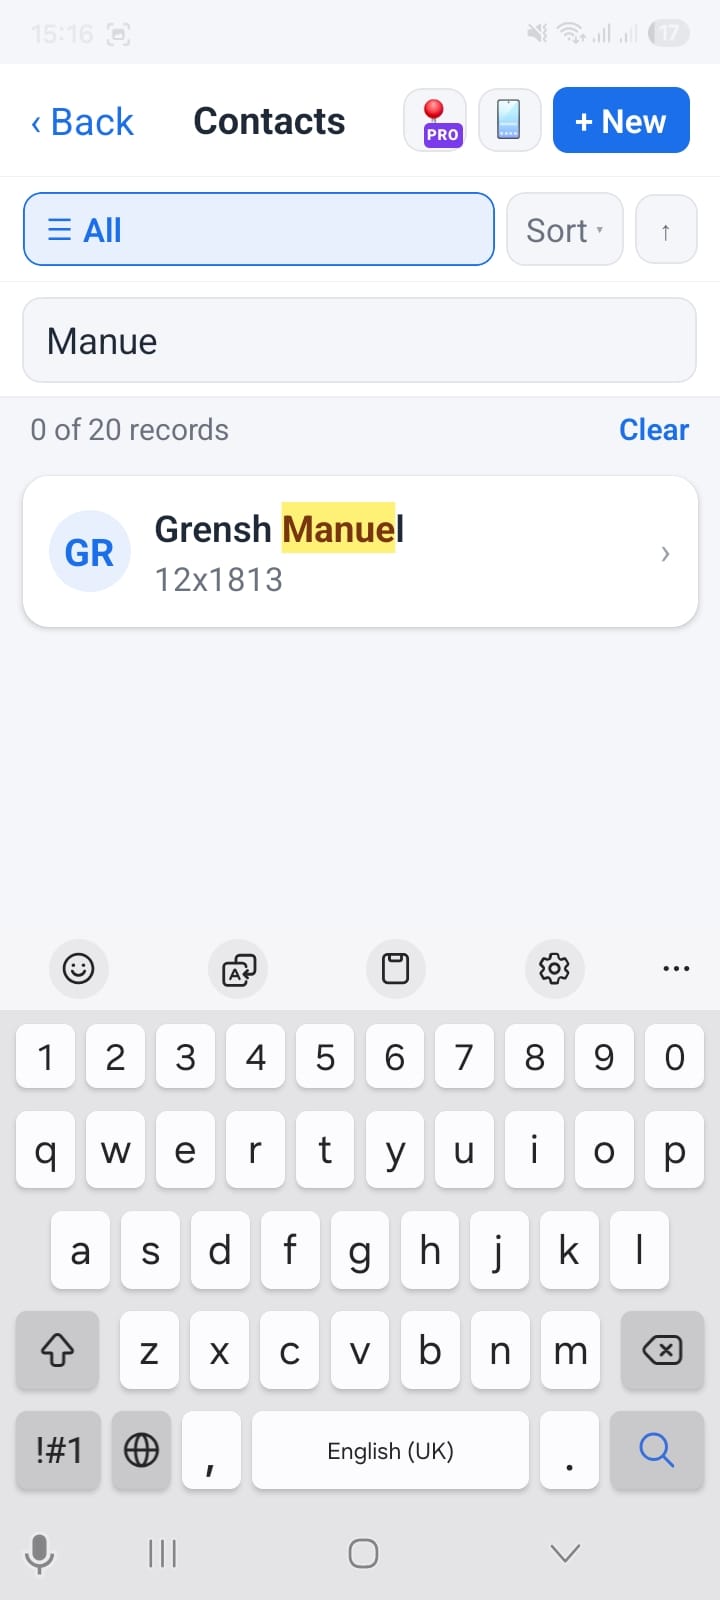
Typing "Manue" instantly surfaces "Grensh Manuel" — matched keyword highlighted in yellow, result count updates live
Editing a Contact Record
Open any contact and tap the blue Edit button (floating, bottom-right corner) to enter edit mode. The form is organized into labeled sections — Basic Information, Address Details, Description Details — mirroring your vtiger CRM field layout.
A required-field counter appears in the header (e.g., "2 / 2 required filled") so you always know whether the record is ready to save. When all required fields are filled, the counter turns green and the Save button activates. You can also tap Save Changes at the bottom of the form.
Date fields (like Support End Date) open a native date picker. Address fields support autocomplete (covered in the next section). The Cancel button discards all unsaved changes and returns you to the detail view.
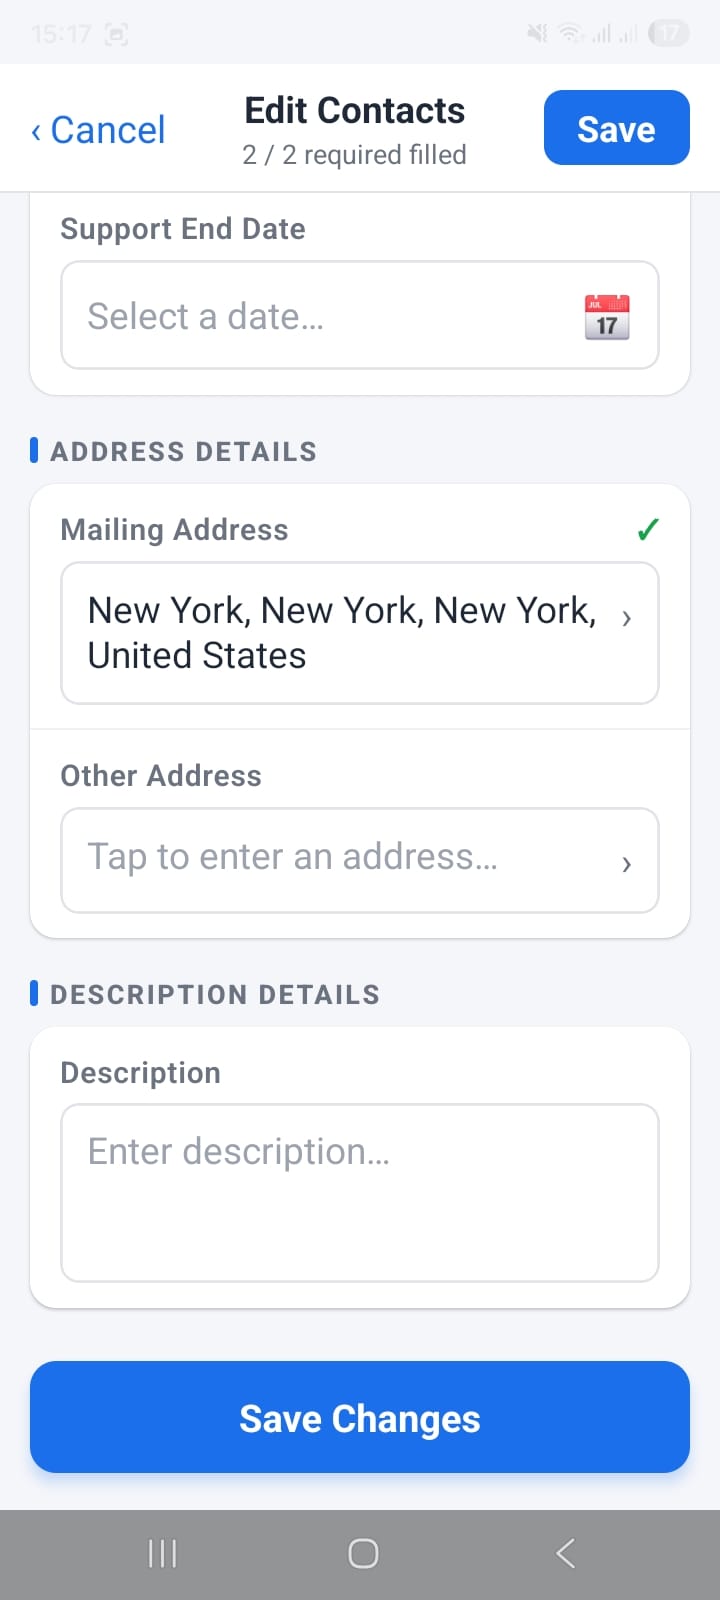
Edit form with sections, required-field counter (2/2), and address autocomplete — Save Changes button at the bottom
Address Autocomplete — Fill Addresses in Seconds
When editing the Mailing Address or Other Address fields, a smart autocomplete dropdown appears as you type. Start with just a few characters — for example, typing New immediately surfaces:
- New York, NY, United States of America
- New Orleans, LA, United States of America
- Newcastle upon Tyne, North East, ENG, United Kingdom
- Newport, WLS, United Kingdom
- Newark, NJ, United States of America
Tap any suggestion and the Street, City, State / Province, and Country sub-fields are all filled in automatically. This eliminates typos and dramatically reduces the time spent entering address data on a mobile keyboard.
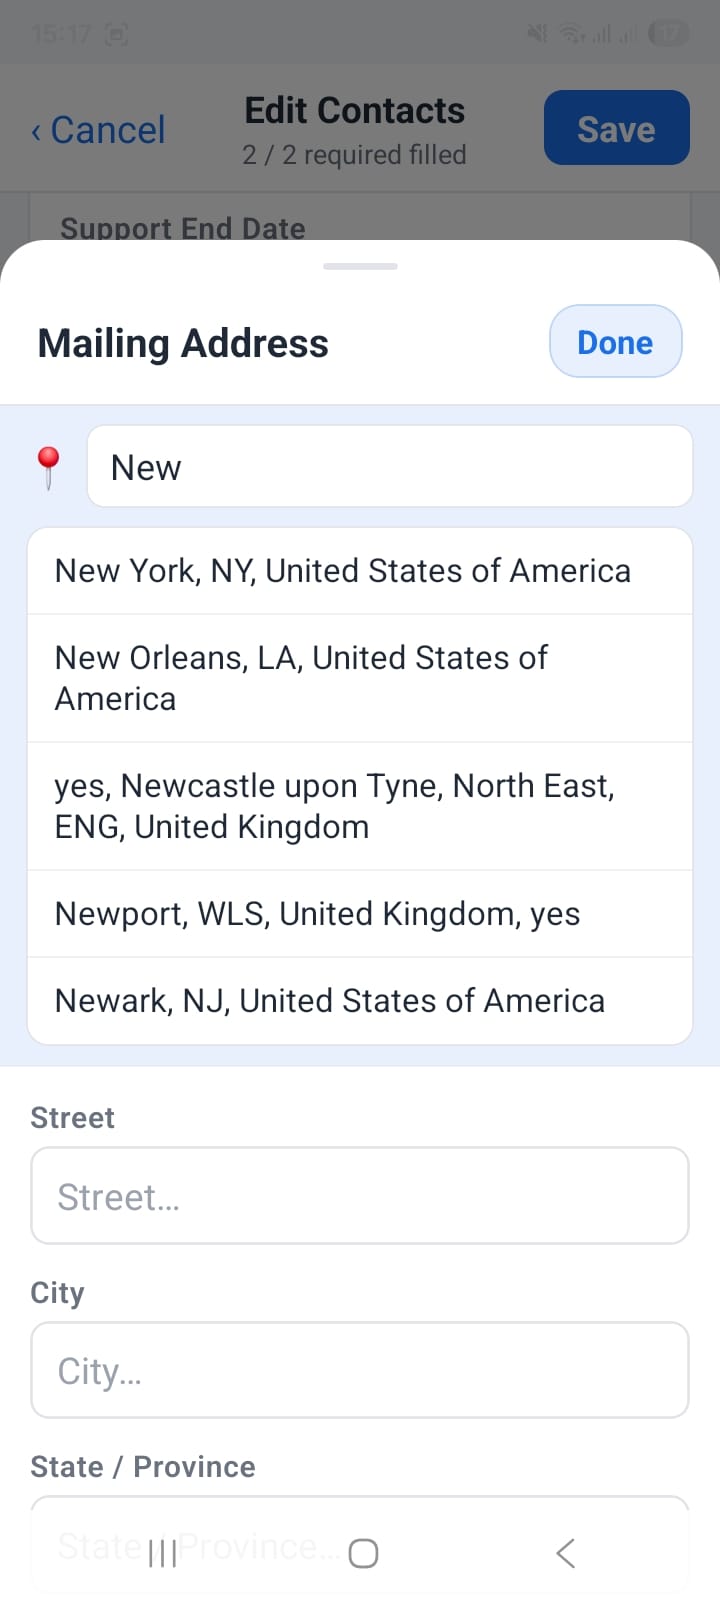
Address autocomplete — type 3 letters to see location suggestions; tap one to auto-fill all address sub-fields
Importing Contacts from Your Phone
OpenCRMApp lets you push contacts from your device's address book directly into vtiger CRM — no CSV export, no desktop required. This is especially useful for field sales reps who collect business cards or save numbers locally before syncing them to the CRM.
Opening the Import screen
From the Contacts list, tap the import icon in the top-right header (next to the PRO badge and + New button). The app requests access to your device contacts the first time, then presents the Import contacts screen showing your phone's address book.
Selecting contacts to import
Each contact appears as a row with a checkbox, an avatar initial, their name, and — if available — their phone number or company name. You can:
- Tap Select all (10) to check every contact at once
- Use the Search contact… bar to filter the list when you have many phone contacts
- Tap individual checkboxes to pick specific contacts
The header subtitle updates in real time — it shows "10 contacts" when nothing is selected, and switches to "2 selected" (or however many you've checked) as you make your selection. Selected rows are highlighted in blue for a clear visual confirmation.
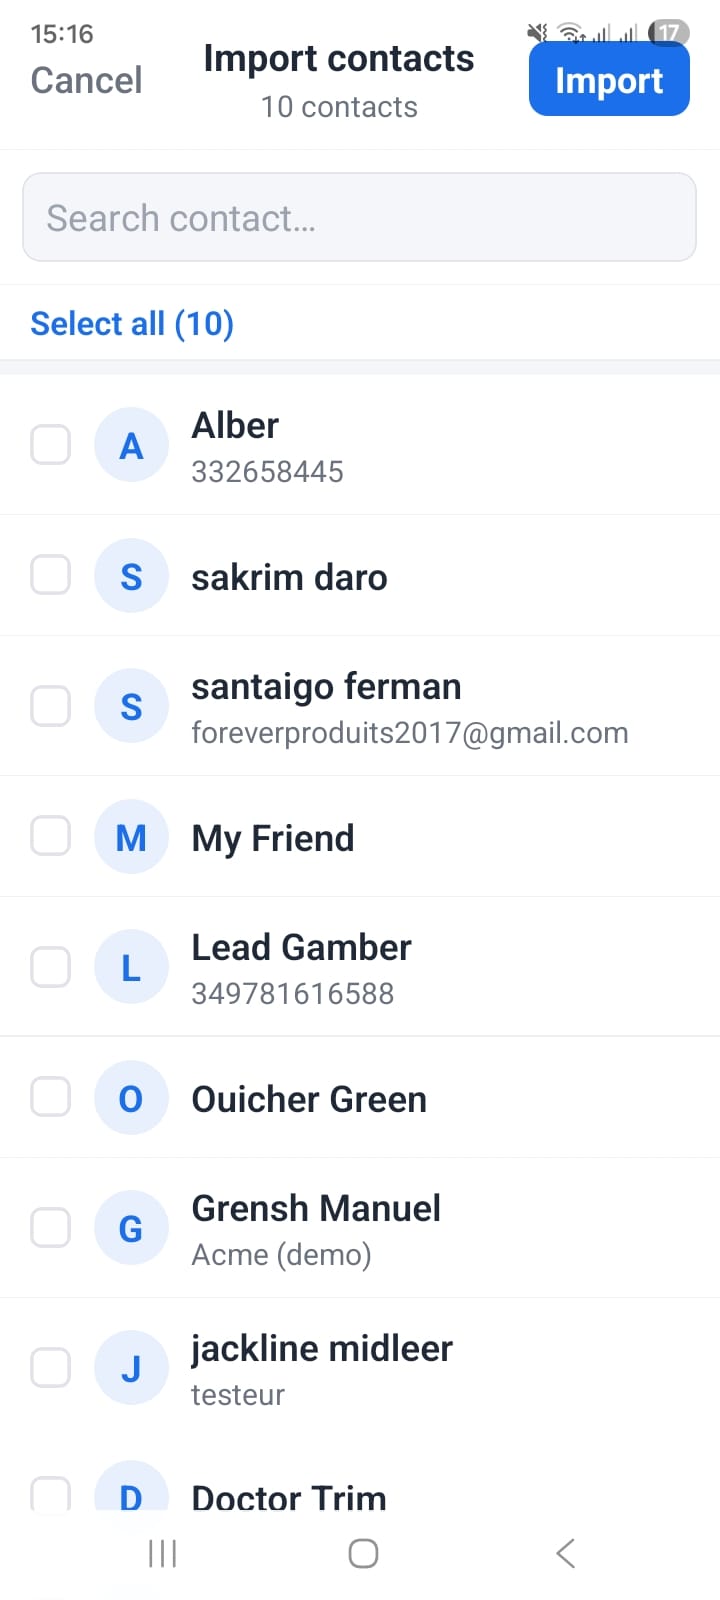
Import screen — 10 phone contacts listed, none selected yet
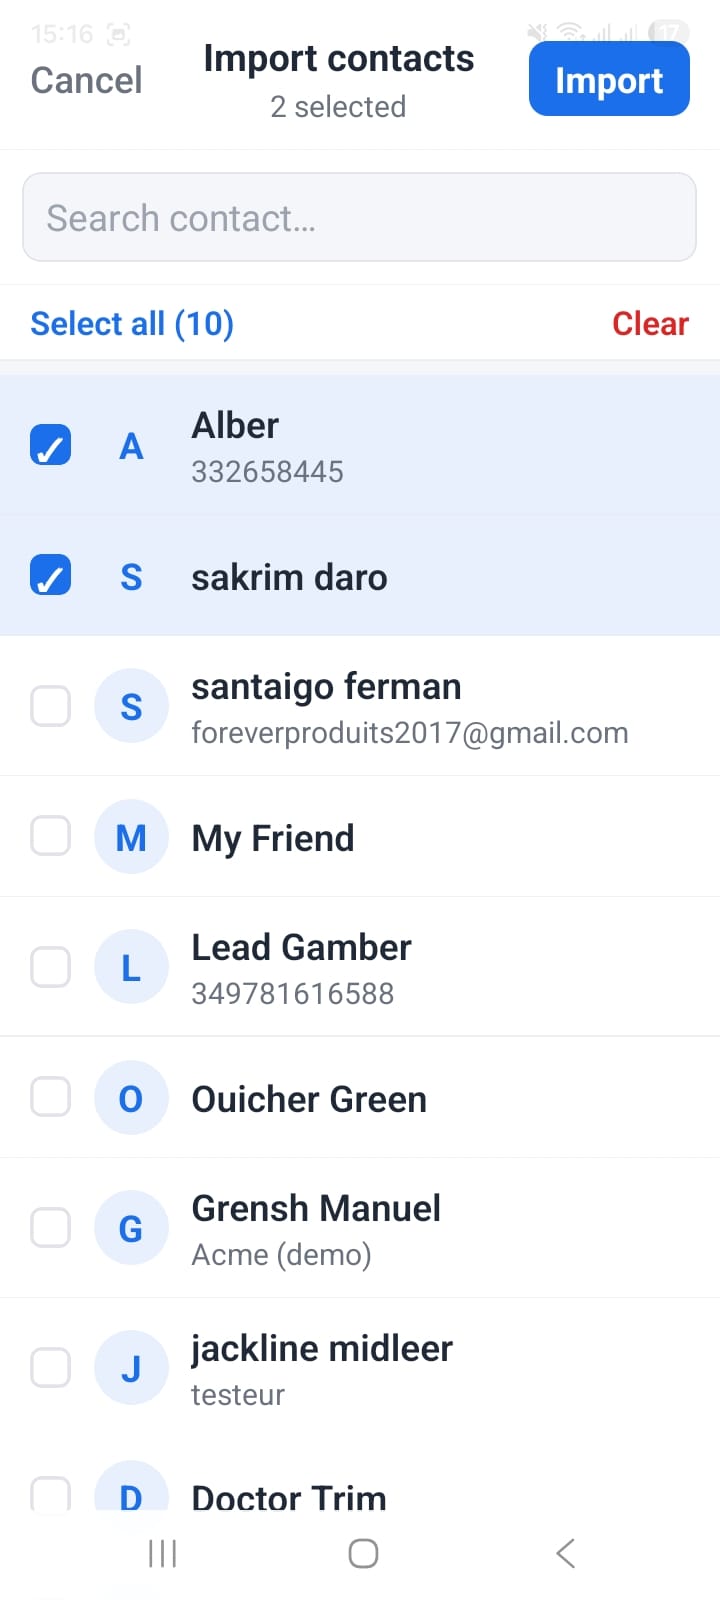
2 contacts selected — rows highlight blue, header updates to "2 selected", Clear appears
Completing the import
Once your selection is ready, tap the blue Import button in the top-right corner. The app creates new Contact records in your vtiger CRM for each selected phone contact, mapping name and phone fields automatically. The new contacts then appear in your Contacts list immediately.
Duplicate & Delete Actions
From inside a contact's detail view, tap the three-dot menu (⋮) in the top-right corner to reveal the Actions sheet. Two options are available:
- Duplicate — creates an identical copy of the contact record in vtiger CRM. The new record opens immediately so you can adjust the name, company, or other fields before saving. Useful when onboarding multiple contacts from the same company who share most of the same data.
- Delete — permanently removes the contact from vtiger CRM. A confirmation step prevents accidental deletion.
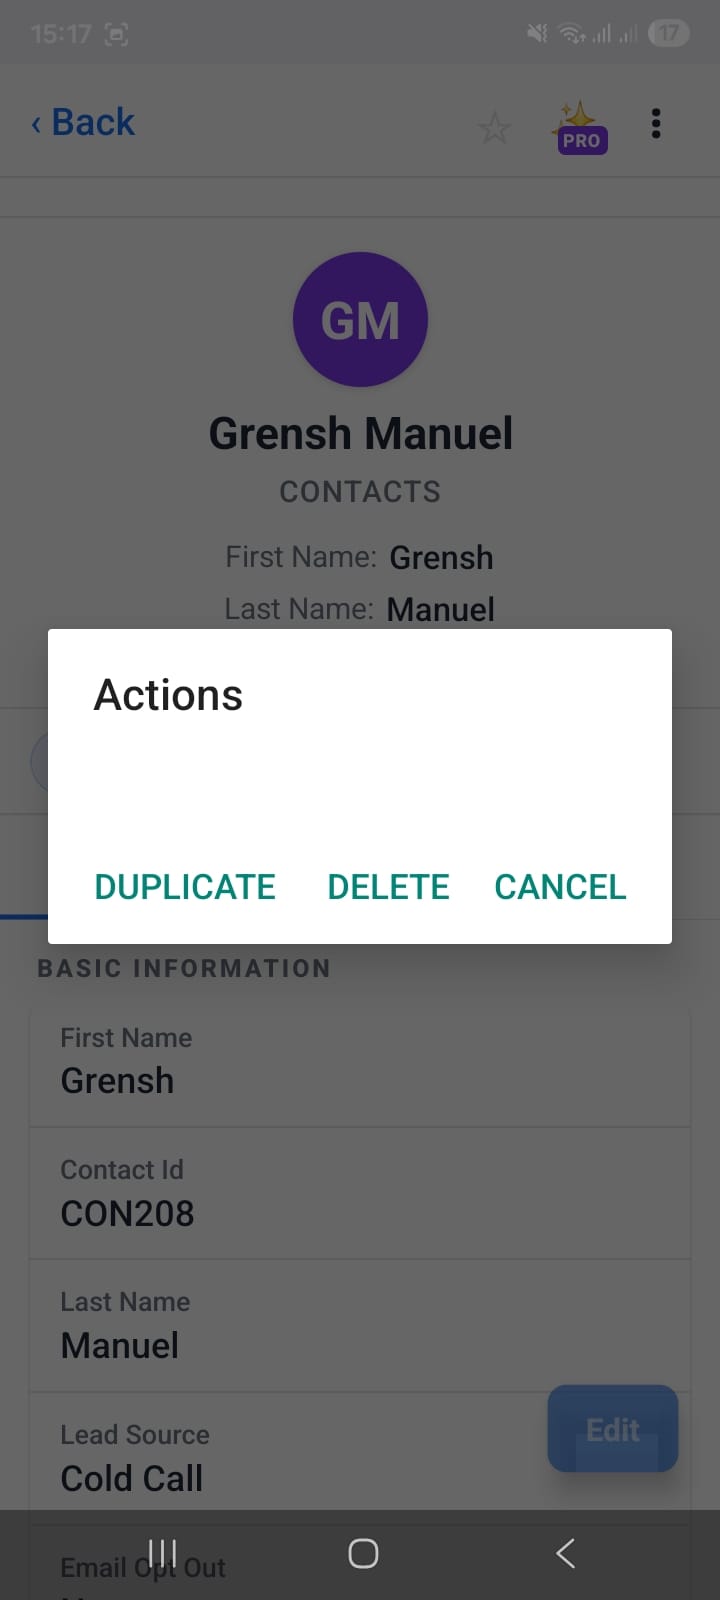
Three-dot menu opens the Actions sheet — Duplicate to clone the record, Delete to remove it from vtiger CRM
Related Modules — 18 Linked Panels in One View
Every contact record has a Related tab that aggregates all associated records across 18 vtiger CRM modules. Tap Related (18) to see the full panel list — the number in parentheses is the count of modules linked to this contact type, not the count of records.
The related panels available for Contacts include:
- Activities — linked Tasks and Events, with quick Task + and Event + buttons to create new ones without leaving the contact
- Emails — all emails exchanged with this contact tracked in CRM
- Tickets — open and closed support tickets (tap + to create a new ticket directly)
- Quotes — quotations sent to this contact
- Purchase Orders — POs associated with this contact
- Sales Orders — confirmed sales orders
- Products — products linked to this contact's account
- Documents — attachments and files stored in the CRM
- Campaigns — marketing campaigns this contact is enrolled in
Each panel shows a count badge next to the module name. Tap the › arrow on any panel to expand it and see the individual records. Tap the + button (where available) to create a new related record without navigating away from the contact.
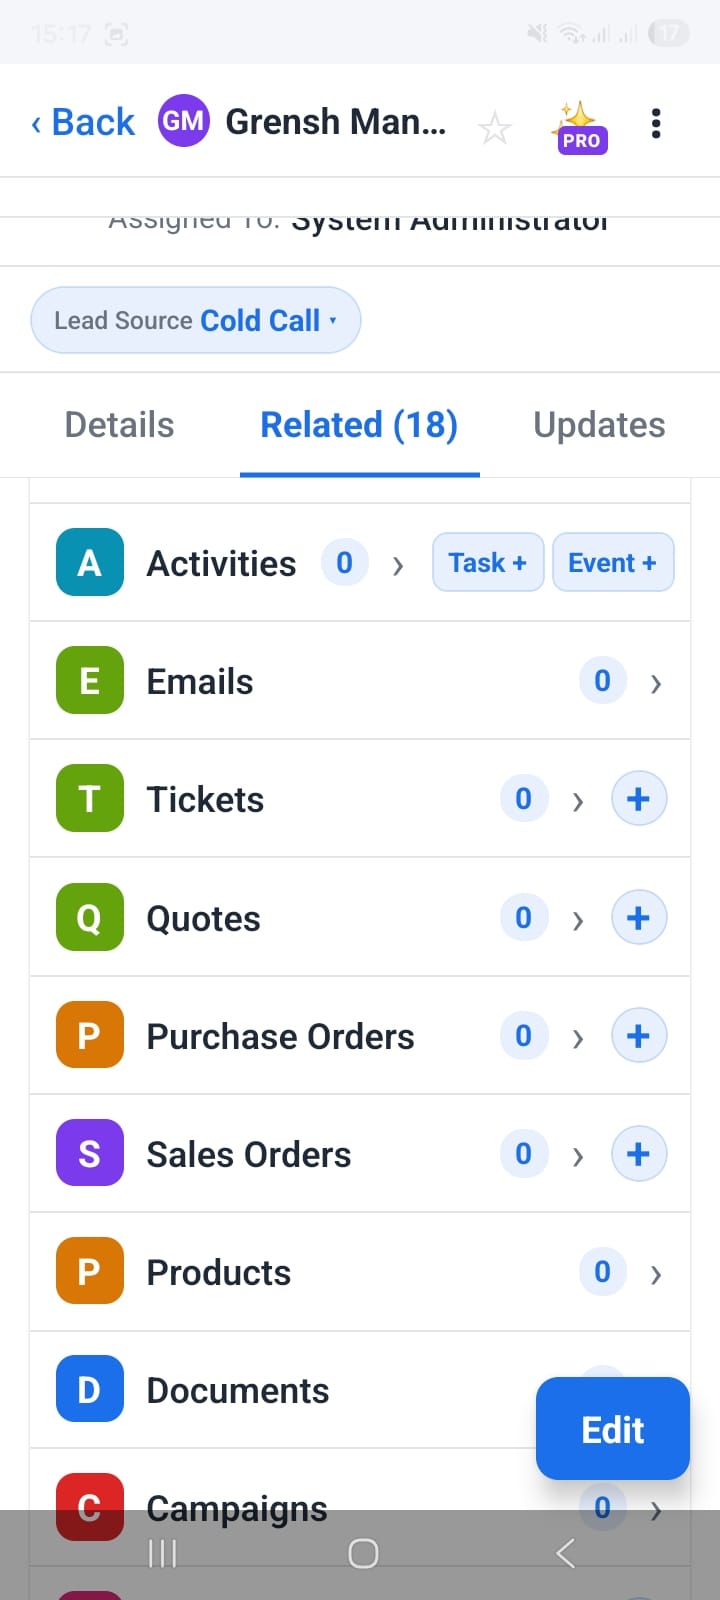
Related (18) tab — all linked CRM modules in one scrollable list; + buttons create new records in-place
Summary: Full Contact Management from Your Phone
OpenCRMApp gives you every core contact management workflow on mobile — no compromise:
- Switch between saved list views (VIP, Birthdays, Not Contacted in 30 Days…) with one tap
- Search in real time — keyword matches highlight in yellow as you type
- Edit any field with a required-field counter ensuring data quality before saving
- Address autocomplete fills street, city, state, and country in one tap from a suggestion
- Import contacts from your device — select individually or all at once, then push to vtiger CRM
- Duplicate or delete a contact via the three-dot action menu on the detail view
- See all 18 related modules (Activities, Emails, Tickets, Quotes, Orders…) under one tab and create new linked records in-place